Feeling nervous about snipping that beautiful trailing vine? You’re not alone. Maybe your String of Pearls has gone a little leggy, or you want more plants to hang in every sunny corner of your home — either way, propagation is the perfect fix. This rewrite keeps all the practical, technical steps from the original article but strips out the lab coat and adds a human voice. Expect plain language, quick jokes, a couple of relatable mini-stories, and clear visual cues so you actually enjoy doing it.
Page Contents
ToggleWhy propagate a String of Pearls? (short version)
-
Want more plants to share or decorate? Propagation gives you exactly that.
-
Have a sparse or top-heavy vine? Cut and replant to make it fuller.
-
Trying to rescue a struggling plant? Healthy cuttings can be a fresh start.
Quick primer: what is a String of Pearls?
Short answer: it’s Curio rowleyanus (formerly Senecio), a trailing succulent with round leaves that look like—yup—pearls. It stores water in those tiny beads, so it hates being waterlogged. Bright, filtered light + fast-draining soil = happy pearls.
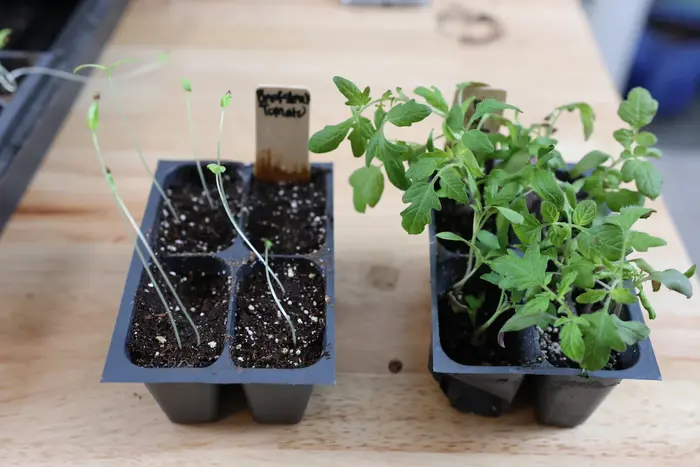
When’s the best time to propagate?
Spring and summer are ideal because the plant is actively growing. If you try this in winter, roots will be slow to form — not impossible, just slower.
What you’ll need (not fancy, just useful)
-
A small pot with drainage (terra cotta is great)
-
Well-draining succulent/cactus mix (+ perlite or pumice if you have it)
-
Optional: rooting hormone, small pins or paperclips to anchor vines
-
A sunny spot with bright, indirect light

Which propagation method should you pick?
There are four good ways — each has pros and cons.
-
Stem cuttings in soil — most reliable; gives strong plants.
-
Laying cuttings on top of soil (the “lazy” method) — super easy; great for filling a pot.
-
Water propagation — fun to watch roots, but transplanting requires care.
-
From single pearls or leaves — possible but less reliable; slower.
If you want one go-to method, try stem cuttings in soil. It balances speed and success rate.
Step-by-step: Soil propagation (best all-round method)
This is the most dependable method. Follow these steps:
-
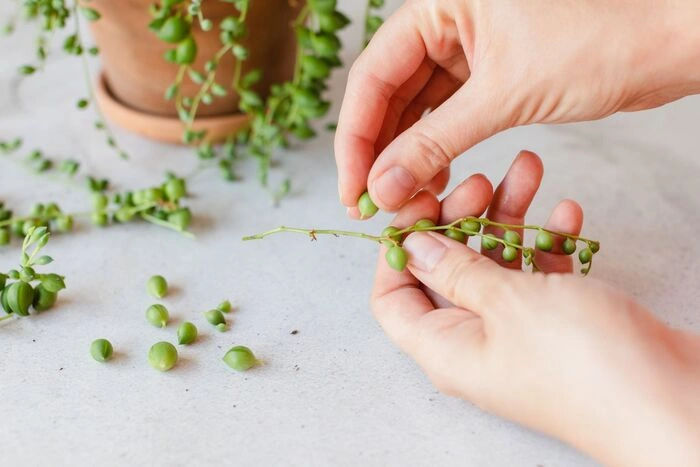
Pick healthy vines. Choose green, flexible stems — not shriveled or mushy. Aim for 10–15 cm (4–6 in) lengths with lots of beads.
-
Cut and let the ends callous. Make a clean cut below a node. Let the cut end dry for 12–24 hours so it forms a tiny scab — this lowers rot risk.
-
Strip the lower pearls. Remove the little beads from the bottom 2–3 inches so nodes are exposed — roots form from those nodes.
-
Prep your pot. Use a small pot with drainage and a gritty succulent mix. Lightly moisten the mix — not wet, just slightly damp.
-
Plant the cutting. Bury the stripped section so at least 2 nodes are under soil. If the vine keeps springing up, pin it with a paperclip or small U-shaped plant pin.
-
Place in bright, indirect light. Avoid harsh midday sun until roots establish.
-
Water sparingly. Mist the surface or water lightly when the top 1–2 cm is dry. Overwatering is the most common mistake here.
-
Check for roots after 3–4 weeks. A gentle tug should meet some resistance when roots form.
Quick tip: Terra cotta pots help wick moisture away from the soil, which reduces rot risk.
The “laying on top” method (easy and forgiving)
Lay a long vine across the soil so as many nodes as possible touch the mix. Pin sections down. Roots will form where the nodes touch. Great for covering a pot and very little work.

Water propagation (watch the roots grow)
If you love seeing roots form, water propagation is satisfying:
-
Put the stripped nodes or cut end in a jar of clean water (pearls should stay above water).
-
Change water every 2–4 days to prevent gunk.
-
Once roots are ~2–3 cm (1 in), transplant carefully to soil.
Be warned: transplanting from water to soil can shock the cutting — be gentle and keep soil slightly moist for a few weeks.
Also Read:
- How to Install a Mini Split: A Friendly, Step-by-Step Guide (that won’t make you panic)
- How to Make a Fast Paper Airplane: Designs, Tips & Tricks to Fly It Like a Jet
Can you root single pearls or leaves?
Short answer: sometimes. Success rates are lower because roots prefer to start at nodes (stem junctions). If a pearl comes off with a bit of stem attached, your chances are better.
Aftercare: how to raise strong little pearls
-
Light: Bright, indirect light. Rotate pots so growth is even.
-
Water: For new plants, be conservative. Let the top soil dry partially between waterings.
-
Feeding: After a month or so, a light diluted succulent fertilizer can help. Don’t overdo it.
-
Repotting: Move to a larger pot only when roots fill the container — and don’t go huge; that traps moisture.
Troubleshooting — what probably went wrong (and how to fix it)
-
Cuttings turned mushy → rot. Cause: too much moisture or no callous. Fix: re-cut new healthy material, let it callous, and use drier soil.
-
No roots after many weeks. Cause: too cold or not enough light. Fix: warmer spot, indirect bright light, or be patient — spring/summer roots faster.
-
Leaves shriveling. Cause: either underwatering or root issues. Check moisture and root health.
-
Pests or mold. Cause: stagnant environment. Fix: improve airflow, reduce humidity, treat pests early.
Little hacks that make a big difference
-
Dust the cut end with rooting hormone if you have it — it can nudge roots to form faster.
-
Use small pots first; big pots hold too much water for young roots.
-
If you’re impatient, a low-heat plant mat helps warm the soil and speeds rooting in cool homes.
-
Keep a “propagation journal” with dates so you know what worked. Yes, people do this — and it helps.
FAQ (short answers)
Q: How long until roots appear?
A: Usually 2–4 weeks in warm, bright conditions. Cooler temps = slower roots.
Q: Which method is fastest?
A: Soil stem cuttings are typically fastest and most reliable.
Q: Will pets eat these?
A: Avoid letting pets munch on them — String of Pearls is mildly toxic if ingested.
Final pep talk
Propagation isn’t a test — it’s practice. You’ll get better with each attempt, and honestly, half the fun is the small victories: tiny white roots, the first new pearl, that fuller hanging basket that makes your coffee nook feel cozier.
Want to try this weekend? Pick one method, gather your tools, and start with three cuttings — that’s a good, low-pressure experiment. If it fails, you’ve learned something and you’ve still got the remaining plant. If it succeeds, you’ve got new plants to gift or decorate with.
Share your results! Post a photo of your propagation attempt, tell us which method you used, or ask a troubleshooting question — people love before/after shots. Need a printable checklist, a quick video walkthrough, or a troubleshooting template? Tell me which and I’ll draft one for you.